


The Timeless Beauty of Natural Stone: Travert...
There is nothing that speaks, timeless elegance, quite like natural stone.

Dark stains and mould on your bathtub seals? It’s time to replace them.
• Silicone gun
• Putty knife
• Utility knife
• Sponge
• Scraper
When the sealing around a bathtub starts to crack and become a home for dark stains that signal mould, it’s time to replace it. The sealant is the watertight seal between the bathtub and the wall. Once the sealant’s integrity is compromised, water can invade the wall, causing rot in the framing around the tub.
Laying a smooth, clean-looking bead of sealant is tricky. If it does not go right, you can wind up with sticky sealant all over the place and a sloppy-looking job. It takes a little technique and practice to lay a sealant bead like a pro. Before you reseal your tub, first remove old sealant. Clean the joint so new sealant will bond properly, creating a watertight seal (see images below).
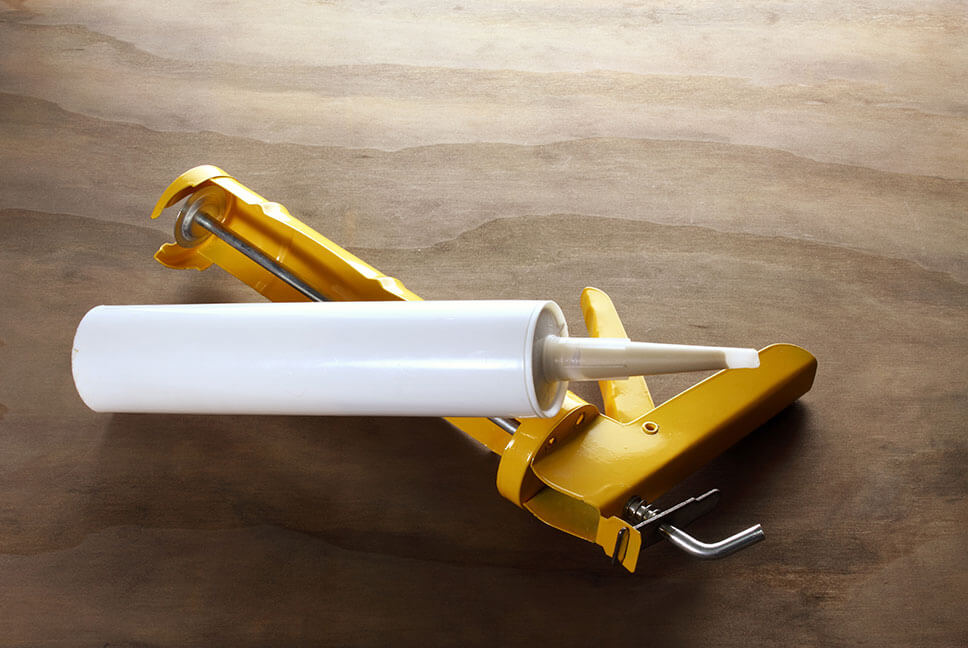
Cutting the right sized opening at the tip of the sealant tube is critical for a smooth bead. A large opening will spread too much sealant into the joint and you’ll wind up getting it all over the place. It is better to cut the tip too small at first because you can always recut it if necessary.
Cut the sealant tip so the opening is about the diameter of a wire coat hanger. Fill the bathtub with water before sealing. The water weight will maximise the width of the tub/wall joint and prevent future stress and cracking. Once your sealant bead is dry, you can drain the water. Laying a uniform bead of sealant requires constant pressure on the sealant tube. The sealant bead should be sized so that only a slight amount wipes off when you drag your finger over it. Ensure that, as the tube empties, constant pressure is maintained to lay a uniform bead. Finish the bead and clean off the excess sealant. If you are having trouble smoothing the bead of sealant, try rewetting your finger or using a different one. The tile corner joint is just as important as the tub joint.
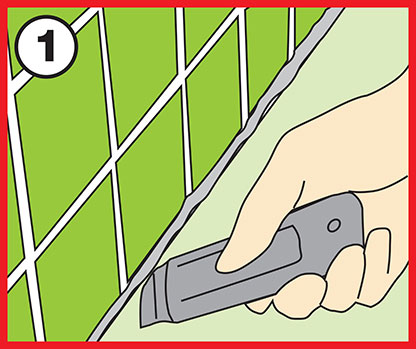
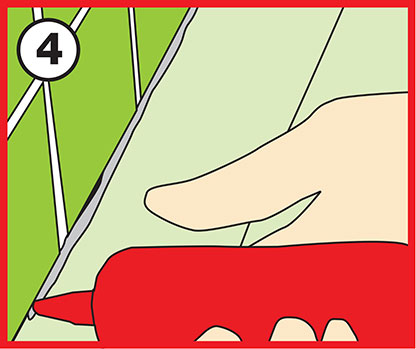
Push a utility knife in all the way under both edges of the old sealant bead to release its grip. Don’t pry the sealant with the knife because you could break off the blade.
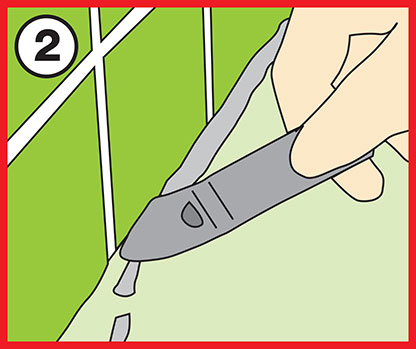
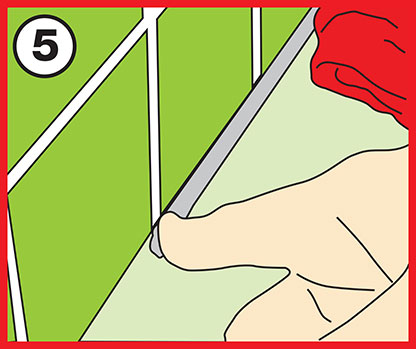
Scrape the loosened sealant out of the joint with the pointed end of a can opener or putty knife.
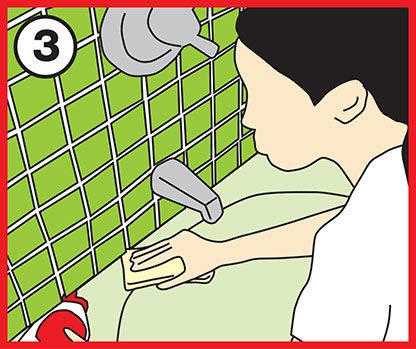
Remove any remaining sealant residue and grime with a tub and tile cleaner and a non-abrasive sponge.
Pull the sealant tube down the tub/wall joint from the inside corner of the tub. Keep even pressure on the tube by pushing the sealant forward and folding over the empty portion.
Dampen your finger in the tub and drag it over the freshly laid bead of sealant. Press the sealant into the joint with the tip of your finger and scrape away the excess with the sides of your finger (it may take a few swipes). Wipe excess sealant off your finger with a damp rag.
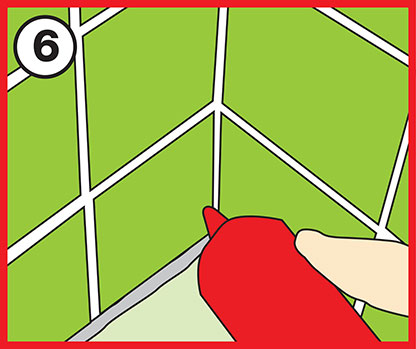
Seal up the tile corner joint if the old sealant has cracked or deteriorated.
Gansbaai Build it Plus forms part of the fastest-growing hardware and building materials group in Southern Africa. The Build it name embraces all activity within the hardware and building industry and supplies quality building materials at the best possible prices for large and small-scale building ...
View ProfileXplorio is your local connection allowing you to find anything and everything about a town.
Read MoreThere is nothing that speaks, timeless elegance, quite like natural stone.
Natural Stone has been used for millennia across the globe for decorative purposes, it never loses its beauty and adds a timeless elegance to any structure.
Follow these easy steps to hanging wallpaper and you will find the job easier than you imagined.
Back in the time of the caveman, humans have been using crude tools to make basic objects, such as arrowheads and wheels.
Say 'Yes, open a Build it cash account today', and get R100 credit for FREE, when you deposit R1,000.00 or more!
Ponds are probably the single most important wildlife feature that can be added to a garden.


