


The Timeless Beauty of Natural Stone: Travert...
There is nothing that speaks, timeless elegance, quite like natural stone.

Laminate flooring is a great flooring option because you can have the beautiful look of a hardwood floor without all the maintenance. Installing a laminate floor may seem like a daunting task, but with some basic knowledge and a small array of tools, the average homeowner can install a floor in a relatively short amount of time.
• Scissors or a knife
• Set Square
• Pencil
• Ruler
• Dust Mask
• Hacksaw or Jigsaw (with laminate blade)
• Trim Cutters
• Fitting Wedges or Expansion Spacers
Locking flooring boards have long and short tongues on the sides and the ends that lock together. This makes it easy to unlock the floor again if you want to move it. Condition the boards before fitting, lay them horizontally in their packing, in the room where they are to be used, for at least 48 hours.
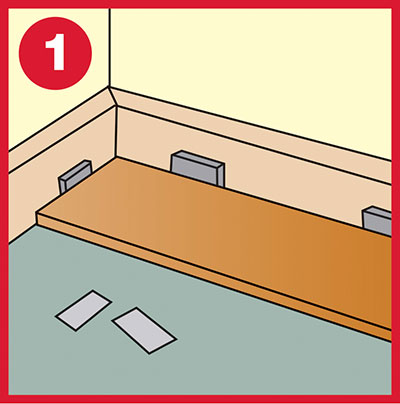
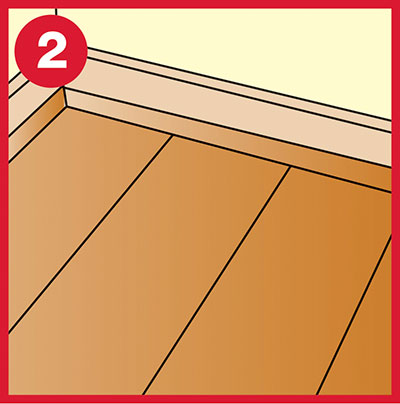
Laminate flooring expands and contracts naturally, so you need to leave a gap of 10mm between the boards and the skirting board when fitting, using fitting wedges or expansion spacers. Lay the boards lengthways towards the light source. Lay the first board in a left-hand corner over your underlay and the end with the short tongue against the wall. Fit wedges at intervals between the board and the skirting following the manufacturer’s instructions. Check that the board is square with the wall.
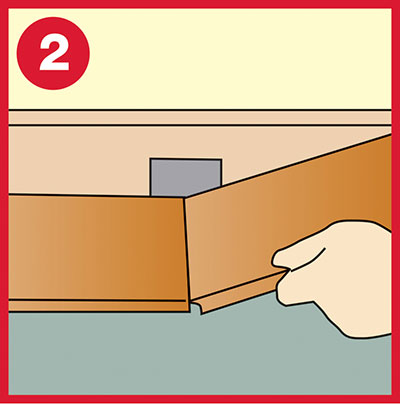
1. Lay the next board end-on, placing the short tongue of the second board into the long tongue of the first at a 30° angle. Lower the board and lock into place. Lay more boards in the same way until you reach the end of the row, where you will probably have to cut a board to make it fit.
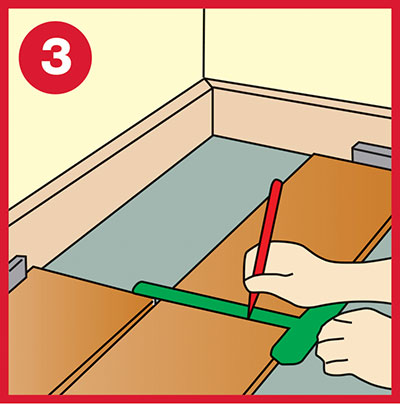
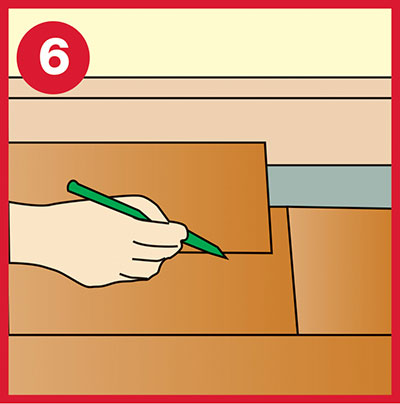
2. To measure the last board, turn it 180° and lay it next to the previous one. Draw a line across the last board with the end of the previous one.
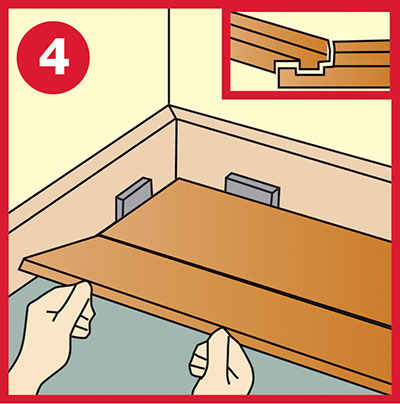
3. Cut and position to complete the first row. Joints should be staggered. If the off-cut is between 300mm - 900mm it can be used to start the next row; otherwise, halve a board.
4. To start the next row, angle cut the board, against the board in the previous row. Cut the end next to the wedge. Press forward and fold down at the side of the board.
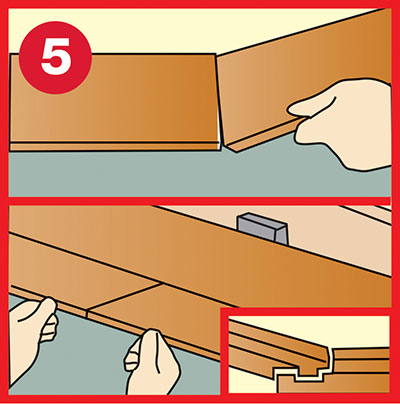
5. Place the short end of the next board at an angle against the previous board and fold down, making sure the board is on the locking strip in the previous row. Angle boards by 30˚ and push against the row in front. When boards are tightly together, push them down.
6. For the last row, place a board at a time over the previous row. Place a third board on top with the tongue touching the skirting and use the edge to mark the cutting line on the board beneath. Cut the board and ease into position. Remove the wedges.
Once the flooring is laid, you can remove the fitting wedges and cover the gap around the edge of the room with the laminate flooring trim chosen to match the floor. The trim should be fixed to the skirting – not the floor – with adhesive.
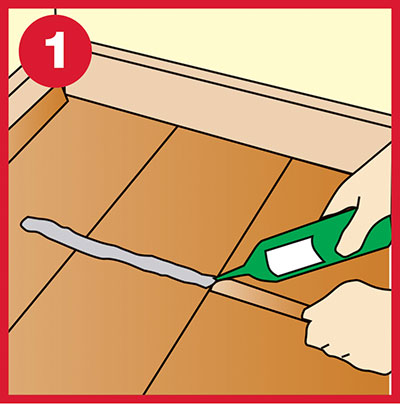
1. Measure and cut lengths of laminate flooring trim. For a neat, professional finish, use trim cutters that cut trim in straight lines or at an angle to fit into a corner.
2. Apply the trim adhesive to the back of a length of flooring trim (not base) so that it will stick to the skirting board rather than the floor. Press the trim into place and, if necessary, secure them with some heavy weights, while the adhesive dries.
Gansbaai Build it Plus forms part of the fastest-growing hardware and building materials group in Southern Africa. The Build it name embraces all activity within the hardware and building industry and supplies quality building materials at the best possible prices for large and small-scale building ...
View ProfileXplorio is your local connection allowing you to find anything and everything about a town.
Read MoreThere is nothing that speaks, timeless elegance, quite like natural stone.
Natural Stone has been used for millennia across the globe for decorative purposes, it never loses its beauty and adds a timeless elegance to any structure.
Follow these easy steps to hanging wallpaper and you will find the job easier than you imagined.
Back in the time of the caveman, humans have been using crude tools to make basic objects, such as arrowheads and wheels.
Say 'Yes, open a Build it cash account today', and get R100 credit for FREE, when you deposit R1,000.00 or more!
Ponds are probably the single most important wildlife feature that can be added to a garden.


